|
Painting Your Kitchen Cabinets: Detailing the Steps in the Process
When painting your kitchen cabinets remember to choose your paint carefully and wisely. Think you've found a color you could live with? Hang tight for a moment before buying multiple cans of it. Ask for a color sample and bring this home to paint a concealed portion of the back of one of your cabinet doors. Make sure the light is shining directly on this color sample before you make your final decision. Love it? Then go for it. If you are still unsure continue searching.
Tip: After removing your doors look at the items kept in the cabinets. Are there any shelves that would look great without a solid door? If so, consider a glass door front or even leaving the door off and exposing the cabinet shelves. Both are hot ideas today in kitchen cabinet design.
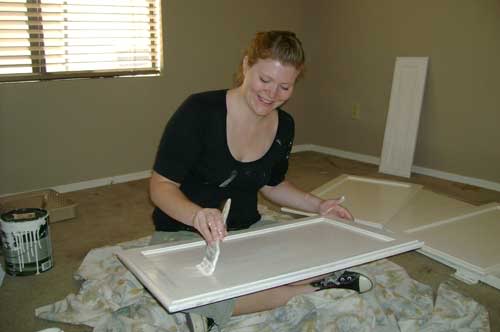
Steps in Painting Wood Cabinets1) Clean the cabinets and doors with a wet sponge and one of the compounds listed below to remove grease, wax and build up that will interfere with paint adhesion. Some recommendations: denatured alcohol or orange oil cleaner. If you wish to forgo this step you may try painting a base coat of KILZ. This should prevent any problems with paint adhesion. Usually this step is unnecessary unless the kitchen has had greasy food cooked in it over many years. Painting your kitchen cabinets with KILZ applications 2) Carefully sand off any rough areas on the cabinets.(If you did need to apply KILZ, this step should be done beforehand). After light sanding wipe surfaces with a tack cloth to remove any excess sawdust. 3) Begin by painting your kitchen cabinets doors first. Apply a primer/sealer to the center of the cabinet surfaces and move outwards.(You may skip this step if you applied KILZ above) If you have chosen a dark color or a bold, bright color consider tinting your primer to a shade of the final color. By tinting your primer, this ensures that your paint coat will be the rich shade you are striving for. Make sure to follow the wood grain and not go against it. The reason it's a good idea to use the primer/sealer is because it sets up well if a water based paint is to be applied to it.
Usually water based paint doesn't adhere well to cabinets that have previously been finished so this step is necessary to get a good adhesion. Oil based paints are more durable on kitchen cabinets but are also more difficult to clean up. Read instructions on can to assure complete dry time. 4) Next apply your paint to the door surfaces. Be sure to choose semi-gloss or high-gloss paint when painting your kitchen cabinets. Remember, the better the quality of the paint and brush, the more professional the appearance of the job. As before, go with the grain when applying the paint. Go light and apply at least two or three coats of paint. Make sure you give your paint ample drying time between coats, read the label on the back of the can which usually allows for approximately 4 hours between coats. Semi-Gloss/Hi-Gloss Cabinet Paint Manufacturers 5) After finishing the doors, repeat the steps above on the cabinet bases. Make sure not to rush the job of painting your kitchen cabinets in order to get a clean professional appearance. Remember the tortoise beat the hare! 6) After waiting for the surfaces to completely dry... Rehang the cabinets by using the markings you made on each door and drawer as to location. Searching for inexpensive, yet classic hardware to complete the job? Here is a great selection of hardware parts.
Interested in a more antiqued look of glazed kitchen cabinets? For instructions on glazing kitchen cabinets Click here.
|
