|
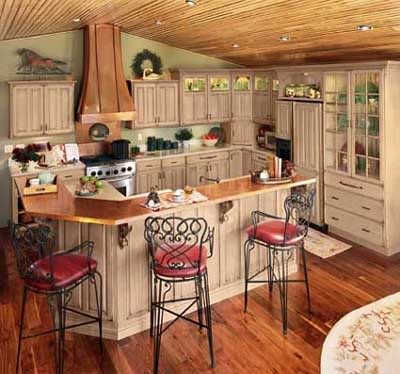
Glazed Kitchen Cabinets: Steps in Faux Painting CabinetsGlazed kitchen cabinets will give your kitchen an old world or antiqued look. This process is often done when attempting to recreate European kitchen cabinetry or French country kitchen cabinets.
Here are some ideas for painting kitchen cabinets with a glaze. Glazing is best performed on raised panel doors which allow the glazing compound to settle into grooves and crevices resulting in the aged look as well adding depth to the cabinets. Flat panel doors do not achieve the same antiqued results. Most commonly the base coat of a cabinet is ivory or vanilla and the top coat is a shade of brown. However glaze can be applied in shades of gray, black or brown. You may apply a light glaze to a dark wood, however this could impart a 'cloudy' look especially if you are attempting to add alot of glaze to tone down the darkness of the wood. It is recommended that you use a small amount of glaze just to give the wood an antiqued look instead of attempting to 'stain' the wood a lighter color with glaze.
The process of faux painting kitchen cabinets is fairly simple and straightforward. If you are concerned about attempting this process for the first time you may wish to do a dry run on the back of one of your cabinet doors to get practice and see the results before tackling your exterior cabinet surfaces.
Supplies Needed for Faux Painting Kitchen Cabinets1 Can of Glaze (May be purchased below) 1 Can of Paint 2 Old Rags/Sponges(Depends on your preference for applying glaze. A rag is recommended for wiping) 1 Disposable Mixing Bowl 1 Disposable Mixing Stick Steps in Antique Painting Kitchen Cabinets / Glazing Kitchen Cabinets1)Begin by removing doors from cabinet boxes and removing all hardware. Be sure to label these to assure you properly place the correct door/drawer and hardware back in it's original home. 2)Start cleaning cabinet doors(see painting your kitchen cabinets for complete instructions). If your cabinets have been freshly painted you make skip this step. 3) Determine whether you wish to go with a light antiqued look or if you prefer darker glazed kitchen cabinets. Open glaze can as well as paint can. Begin by pouring 1 part glaze to 1 part paint in mixing bowl. (Remember the glaze will appear milky white in can but dries to a translucent shade) If you wish to go with a bold look, add 3 parts paint to one part glaze... Want faint glazed kitchen cabinets? Use about 3 parts glaze to 1 part paint. You've got the idea. Glazed Kitchen Cabinets 'Glazing Compound' 4) After adding the glaze and paint, make sure to mix both up well. You can then begin dipping the rag or sponge(again whichever you prefer)in and loading it with the mixture. TIP: Adding the glaze to the paint makes it thinner, more forgiving and much easier to work with. 5) Begin by rubbing the rag on the cabinet door. You can use circular motions or a straight stroke. Pay close attention to which technique gives you the results you desire and stick with it. Many prefer to go with the grain of the wood. 5) Make sure to work in small sections applying the medium to the cabinet door and quickly wiping it off. To achieve the glazed kitchen cabinet look you are striving for, be sure to thoroughly work the mixture into grooves and crevices. This gives you the striated, antiqued look you are attempting to achieve. Really work the glaze in well to all surfaces and carefully wipe it off. Repeat these steps in another area. Don't like the look? That's OK. Just reapply the glaze and wipe off. Since you are working with a thin compound that doesn't dry quickly you may reapply the glaze and rewipe several times. It is very forgiving- just make sure you work on a small area each time. Reapplying the compound several times will result in a richer look for your glazed kitchen cabinets. 6) Make sure to read the instructions on the labels and allow the glaze to dry completely. Usually it takes about 8 hours to dry. However when faux painting cabinets it is advisable to wait about a day before reattaching hardware and rehanging.
|